I spent some time writing about this quilt which I made in 2004, and then realized I already did that a few months ago.

I really want to show this quilt during my lecture since it was the quilt that was a pivotal point for me as I moved away from traditional blocks and towards working more intuitively. Now this quilt lives in Alaska, which will make it difficult to show. I am considering showing an 8 x 10 photo which can be passed around.
Lessons I learned while making this quilt:
• Working intuitively is lots more fun than working from a well planned out design.
• Intuitive abstracted work can look much more natural and lifelike than something carefully planned and executed. Nature is rarely exact and carefully drafted.
• I needed to pay more attention to value. The dark purple and white in the hand dyed fabric which I added gave the quilt a bit of spark that was lacking before.
 I took a workshop from Robbi Joy Eklow in 2006 and made this quilt, and learned her technique for raw edge fusing to build up shapes. I’ve used her technique for several other quilts as well. It’s a great technique if you have drafted a pattern that you want to reproduce accurately. But I found myself wanting to get away from the tediousness of the drafting and tracing, and I found myself wanting to work more intuitively again.
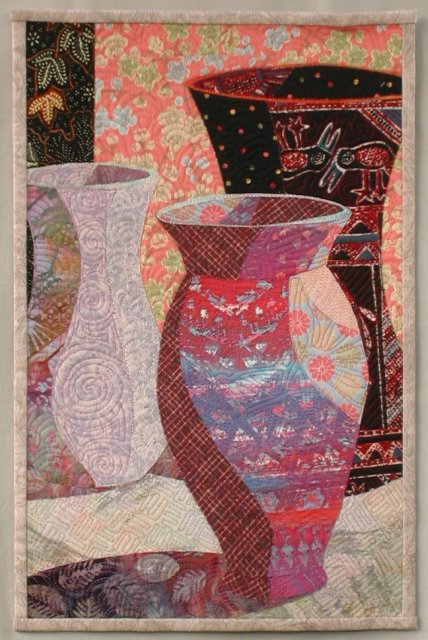 In 2007 for a Fast Friday Fabric Challenge, I found myself creating a quilt from a photo of vases I had set up. Robbi’s technique would have been a logical technique for this quilt, but I thought it would be quicker to cut everything freehand without drawing a pattern first. I ended up working in a very strange way of drafting pattern pieces as I needed them in order to match them up with the previous shapes, and then folding the vases in half to make sure they were symmetrical. It was wonderful fun picking colors and patterns to build the vases with, but not what I was trying to do at all.
 So I decided to do the same vases again while forcing myself to be more spontaneous by not allowing myself to draw patterns for the shapes, and not allowing myself fix the symmetry by folding shapes in half first. I simplified the process by not trying to create shading with the fabric. I added a bit of shading after with transparent paints, and stitched the edges down inspired by the stitching Pamela Allen does on her quilts. I wondered when it was complete if I was a bit too timid with the shading, while the edge stitching tended to flatten the shapes.
 And so I had one last try at my vases. I put away the photo I was working from, and created a similar composition from memory. Cutting fabrics freehand, some used directly from the scrap basket just as they are. This was tons of fun to make, and I am learning to trust my intuition.


